If you can't do these post stroke your doctor and therapists completely failed at their jobs!
I tried an elite athlete’s four-move mobility routine, and it soothed my spine and loosened my hips in just 12 minutes

Someone who trains far harder than me and gives their body the TLC it needs is Laura Horvath, who was crowned the "fittest woman on earth" at the 2023 CrossFit Games.
Horvath swears by the stretching routines on the Pliability app, so I contacted the team to ask for one of her favorite sequences. Then I hopped into some comfortable joggers and unrolled my yoga mat to give it a go.
Here are my top takeaways from the 12-minute session, and instructions for tackling the four-move routine for yourself.
How to do Laura Horvath's four-move stretching routine
This routine is from Pliability's "back pain pathway", a series of 12-minute sessions each designed to alleviate discomfort and strengthen your back. This doesn't mean you'll exclusively be doing back-specific stretches during the routines; surrounding muscles and joints like the glutes and hips will also benefit.
I did the routine by copying the follow-along video on the Pliability app, where Laura demonstrates each move, but you can also do it by following the instructions and prescribed timings below.
All you need is a box or sturdy raised surface to lean on—for reference, I used a weight bench, but the side of a couch or chair can work too.
1. 3D abductor stretch

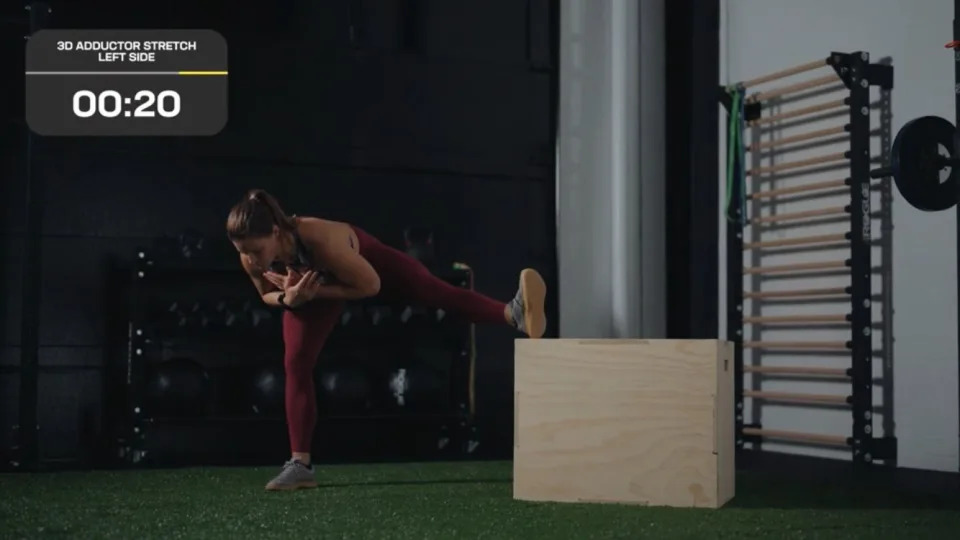
Time: 90 seconds on each leg
Stand to the right of sturdy surface at approximately knee-height—for example, a box, weight bench, chair or couch. Place your left foot on it with your toes facing upward. Your leg should be straight and your body should be facing away from the raised surface.
Lean forward until your torso is as close to parallel with the ground as you can get it while maintaining a flat lower back. Your left toe should always point to the ceiling. Slowly return to the starting position.
My top takeaways
Keeping the toe of your raised leg upright during this stretch is easier said than done, and I found mine kept wanting to tip forwards as I leaned over. I also really had to focus to maintain a flat back.
But the pay-off is worth it. The move delivered a satisfying stretch down the inside of my raised thigh as well as my hips.
Hinging at the hip like this offered similar strengthening benefits to the "good morning" exercise too, as I felt the muscles around my core and lower back kicking into action to support this area.
2. Standing lizard with 'corner' education

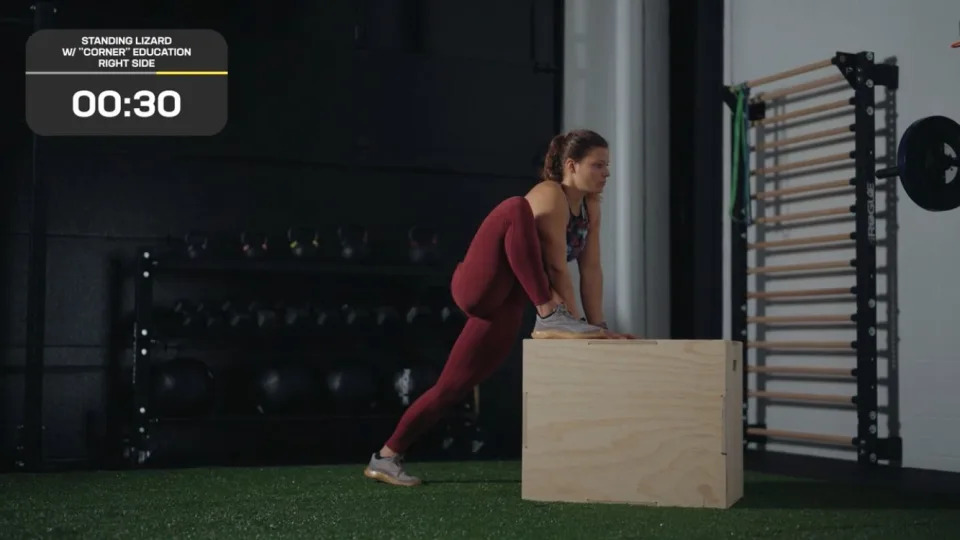
Time: 90 seconds on each leg
Stand facing a box or sturdy surface at approximately knee-height. Raise your right knee and place your right foot on the box.
Sink your hips towards the box. Your knee should always be pointing at the ceiling.
Keeping your legs relaxed, experiment with sinking your hips in slightly different directions to target tight spots.
My top takeaways
If you're searching for a satisfying hip stretch, look no further than the standing lizard with 'corner' education.
The instructor encouraged me to experiment by sinking my hips towards the box in slightly different directions, finding the 'corners', or end ranges, of the stretch.
I really enjoyed being able to play around and find the angles that delivered the deepest stretch for me. I was also somewhat surprised to find my left side felt slightly tighter than my right—this could have something to do with an old soccer injury in my left knee.
What I wasn't so surprised about was seeing that Horvath was more flexible than me. Where she was able to drop her elbows onto the box beside her planted foot, I kept my arms straight and worked within my own limitations.
3. Standing pigeon
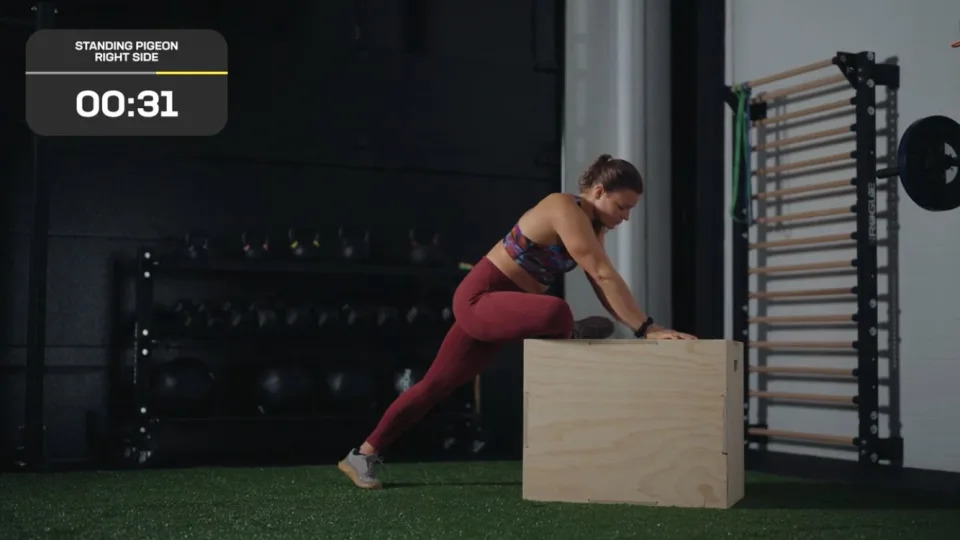
Time: 90 seconds on each leg
Stand facing a box or sturdy surface at about knee-height. With your left foot still on the floor, place your lower right leg on the box so it's lying horizontally. Try and lower your right knee towards the box or sturdy surface it's resting on.
Relax your right leg and sink your hips towards the box to feel a deep stretch in your hips. If you feel any 'pinching' in your hips and lower back, ease off.
My top takeaways
This was the most intense stretch of the lot, and I could really feel it on the outside of my glutes (backside muscles) as well as in my hips.
Slowly trying to lower my knee towards the box had some impact, but the main intensifier for me was sinking my hips lower into the stretch.
I've had problems with pigeon stretch feeling uncomfortable before on my left knee, with the same old soccer injury playing up again, but I had no such issues with this standing variation.
If you do feel any discomfort, the instructors advice was to "back off the stretch... You should not feel this in your knee at all".
4. Jefferson curls
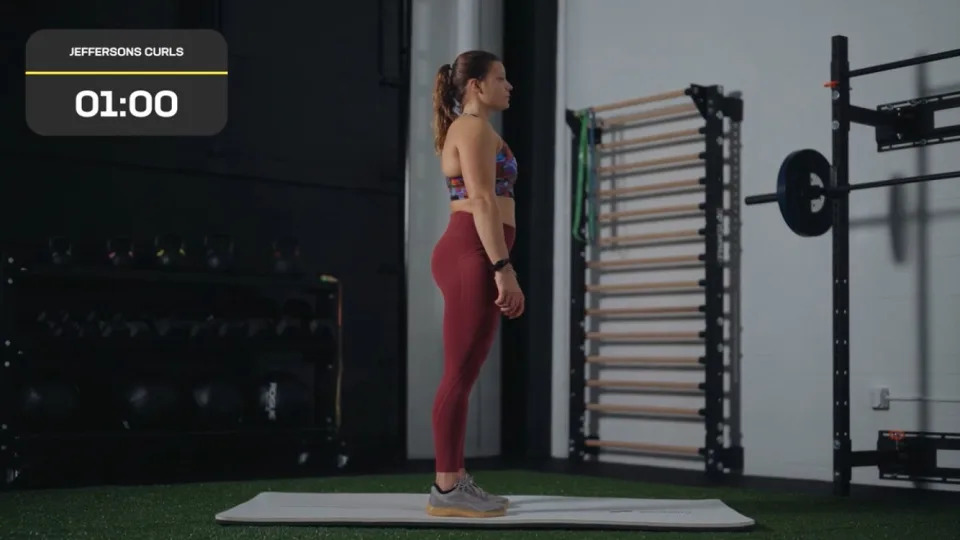
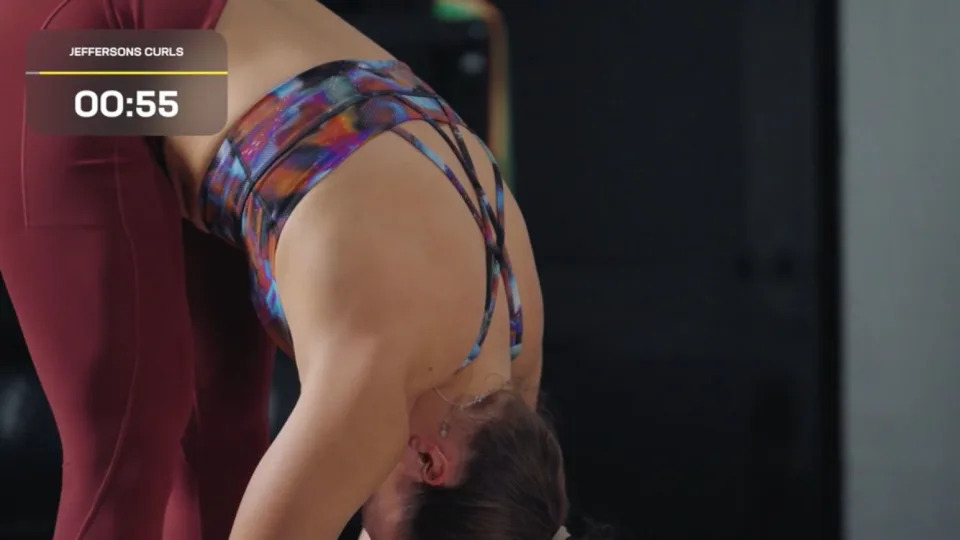
Time: 60 seconds
Stand upright with your feet hip-width apart.
Drop your chin to your chest then allow your head to continue dropping towards the floor, slowly curling your spine one vertebrae at a time. Let your arms hang down towards the floor, allowing your chest and shoulders to be pulled down. When you reach your hips, gently push them backwards while keeping your legs straight, enabling your chest to continue folding forward.
Take a deep breath as you reach the bottom of the stretch, squeezing your glutes (backside muscles) and abdominals. Reverse this movement to slowly return to the starting position.
My top takeaways
After some fairly intense stretches, the Jefferson curl was a breath of fresh air.
I felt it stretching and soothing my spine and neck, which were tight from a combination of heavy deadlifts the day before and plenty of time sitting at my desk.
However, while some muscles relaxed, it was interesting to feel others roar into action to make up for this.
As I left the bottom of the stretch and gradually uncurled my spine, my abdominals switched on to support my spine.
For me, this was incredibly enjoyable and relaxing. But again, the instructor advises: "If you feel pain at any point, back off the range of motion, and do not push into the end ranges."
My final thoughts
After I finished this routine, I felt looser and more relaxed. Some subtle tightness in my lower back from deadlifts the day before had largely subsided, and I was comfortably able to sink into a deep squat thanks to the hip-opening exercises.
What had surprised me most about the routine, as part of Pliability's Back Pain Path, was the absence of too many specific spine stretches like the cat-cow. Instead, most of the moves seemed to focus on my hips, with my glutes also singled out for special attention.
This makes sense when you think about it. The body is a series of interconnecting systems and the spine is far from a one-man band; the supporting muscles and nearby joints play a pivotal role in keeping it working smoothly.
Strong, healthy hips and glutes can support the spine, helping you maintain proper pelvic alignment and good postures. They will also lower your risk of lower back pain or injury by taking some pressure off this area when lifting things.
That's why I'm sure I'll be giving this routine (and similar) another try in the near future.
No comments:
Post a Comment